What is screen printing? An expert guide to the silk screen printing process
Your guide to the screen printing process
Whether its a DIY operation printing t-shirts for a punk band, or mass-produced clothing for commercial retailers, screen printing is one of the most popular printing techniques used in the garment printing industry. Also known as silk screen printing or serigraphy, screen printing describes a process which involves pushing ink through a stencilled mesh screen.
Whether you realise or not, you probably own a number of pieces of clothing that have been screen printed – whether it’s a t-shirt with bold artwork or a simple logo or graphic – and here at ICON Printing we use screen printing to deliver hundreds of orders every week.
In this guide, we’ll run you through everything you need to know about screen printing – from the history of this simple, yet revolutionary process to looking at how it works in practice and what kind of merch order it is most effective for.
Screen printing explained
The history of screen printing
What is the screen printing process?
Why use screen printing?
Screen printing vs DTG printing
The history of screen printing
The history of screen printing goes way back to the Song Dynasty – that’s 960–1279AD – where it first emerged as a printing technique used in China and later Japan. In the 18th century it made its way to Europe, but it wasn’t until silk became more available in the West that it became more readily used.
At the start of the 20th century a number of printers developed a way to create photo-reactive stencils – using emulsions that react and harden under light – revolutionizing the industry and making it possible to use photo-imaged stencils, rather than simply stencils made from paper or card.
In the 60s, Andy Warhol brought the process into the limelight, using screen printing to produce some of his best known work – from his prints of Marilyn Monroe to repeat patterns of Campbell’s Soup – while giving the form credibility as an artistic practice.
In 1967 artist and inventor Michael Vasilantone developed a machine capable of creating multi-colour garment screen printing, which made it possible to use screen printing for team kits and uniforms and ultimately led to the boom in printing on t-shirts and garments we’re still enjoying today.
The accessibility, affordability and versatility of screen printing quickly made it popular with subcultures and underground movements – its aesthetic remains associated with political posters and pamphlets to DIY merchandise and record sleeves.
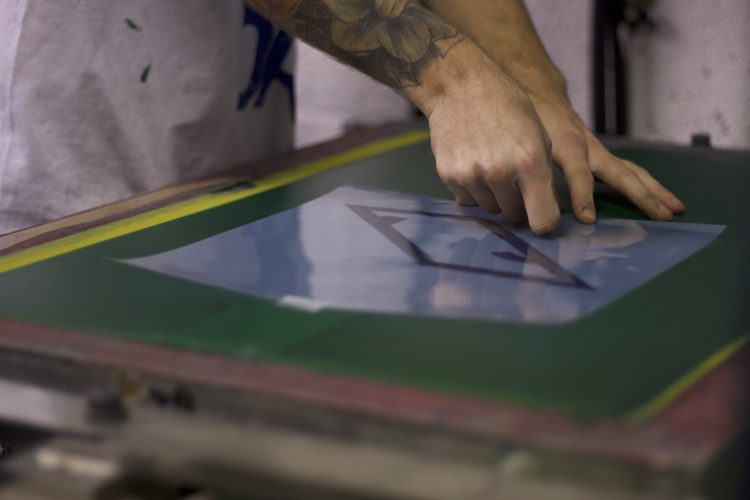
What is the screen printing process?
You’ve got your design, but how does it end up on a t-shirt? Let’s run through the key steps to the screen printing process
- Preparing your artwork — we require a vector file (Adobe Illustrator ideal). We check all colour layers are separated and there are no gradients or hairline elements that won’t transfer to screen properly.
- Transferring artwork to screens — your artwork is exposed to the screen using photosensitive emulsion in a light booth. Each colour requires a separate screen.
- Mixing the ink — colours are matched by weight for precision, including Pantone matching. We can also print neon, fluorescent, glow in the dark, and light-reflective inks.
- Applying ink to screens — each colour has its own screen, mounted on the press with its respective ink applied.
- Test print — we always run at least 2–3 test prints on a scrap garment matching your order colour, checking placement, alignment, and colour accuracy.
- Printing your order — once test prints are approved, your garments are placed onto the print beds and printing begins.
- Heat tunnel drying — each printed garment goes through a heat tunnel to cure the ink and lock in the design.
- Folding and packing — your order is folded, packed, and sent out for delivery.
Why use screen printing?
Screen printing is the most cost effective type of garment printing for high quantities – once the screens are set up it’s very cheap to keep printing and the screens can be saved if you want to return to print the same design again in the future.
The inks used for screen printing are also incredibly durable and the colours are strong and vivid – meaning you can keep a sharp, bold print even after many washes.
Screen printing vs DTG printing
While screen printing is most cost effective for high quantities, DTG printing is good for photographic quality printing, or for really low quantity jobs of around 5-20.
Screen printing is cheapest when producing designs with fewer colours – as each new colour requires a new screen. If a design has a large number of colours – or needs to be photographic – DTG printing is the best option.
While screen printing uses vivid inks, DTG printing uses a thinner ink. While this means DTG can achieve a higher level of detail, it also means it is better suited for printing on light coloured fabrics.
Whether you choose screen printing and DTG, both can be quick enough to have your t-shirts printed and delivered in three days (as long as we have approval from production beforehand).
Design, garment and ink tips for screen printing
Design tips
- Use fonts at or above 12 points and line stroke sizes larger than 0.3pt
- Avoid very small gaps of negative space — ink is a fluid and can spread slightly
- Convert all strokes to paths and outline all text before submitting artwork
- The fewer colours in your design, the lower the cost — each colour requires a separate screen
- Artwork should be vector or raster graphics in .ai, .eps, or .pdf format
Choosing your garment For the highest quality and longest-lasting results, use cotton or cotton-blend fabrics. These are multifilament and have a greater capacity for absorbing ink compared to synthetic materials. Cotton knits offer a softer texture, while woven cotton is breathable in summer and warmer in winter.
Choosing your ink
- Plastisol — the most common choice. Maximum durability, affordable, and excellent for Pantone colour matching
- Water-based — eco-conscious option producing a softer, more breathable finish
- Discharge — bleaches out the garment’s existing dye and replaces it with your chosen colour. Produces very soft results
- Halftone — prints single or multiple colours in gradients, creating the illusion of multicolour printing at lower cost